From RAW document to gallery print. A sensible, no-hype workflow protecting philosophy, coloration technology, mixing, AI equipment, and the enterprise of enhancing.
Your camera does not seize what you noticed. It captures records. Editing is not about solving a terrible image, it is about translating that statistics lower back into the sensation you had standing on that ridge at 5 AM.
Every terrific landscape photograph you appreciate has been edited. Ansel Adams spent hours dodging and burning inside the darkroom. Today, we do it with sliders. The purpose isn’t to make a fantasy world, however to triumph over the technical boundaries of a sensor. A sensor has approximately 12 to fourteen stops of dynamic variety. Your eye has closer to 20. A sensor information light linearly. Your brain perceives it logarithmically. Without enhancing, your Himalayan dawn appears flat, your Western Ghats greens look neon, and your Thar Desert sky is blown out.
This manual is my entire discipline-examined device. We will no longer use presets as crutches. We will construct an understanding so that you can edit any scene, in any light, on any software.
1. The Philosophy and Ethics of Landscape Editing
Before you touch a slider, determine your ethic. This saves you hours of over-editing.
I paintings with three levels. You need to choose one for each task.
- Documentary True: What became without a doubt there. Global changes only. Exposure, white balance, contrast, minor cropping, dust elimination. No object elimination, no sky substitute. This is for contests like Wildlife Photographer of the Year, National Geographic editorial, or nature journalism.
- Artistic Representative: What it felt like. This is wherein ninety five% folks stay. You can combination exposures you shot on the identical time, focus stack, ward off and burn, easy distractions, enhance colour and light, but you do no longer upload elements from some other day or region. The scene stays honest.
- Digital Art: Anything is going. Composite skies from Iceland onto Ladakh, upload moons, replace entire foregrounds. This is first-rate, but you should reveal it. The trouble isn’t the edit, it is the deception.
My rule is easy: if I combination, I handiest combo my personal frames from the equal shoot inside a 30 minute window. If I dispose of, I handiest dispose of brief distractions like trash or a vacationer. I never do away with everlasting factors like a power pylon or a tree and claim it’s miles pure. Your target market will forgive heavy processing if it feels real. They will not forgive dishonesty.
2. Pre-Shoot Planning for Better Edits
Great modifying starts offevolved earlier than you press the shutter. Shoot for the edit.
- Shoot RAW + Expose to the Right (ETTR): Push your histogram to the proper without clipping important highlights. RAW documents hold vastly more information in highlights than shadows. A bright RAW report pulled down in post is cleaner than a dark one driven up.
- Bracket with intent: For excessive contrast sunrises, shoot three frames at -2, zero, +2 EV. For scenes with water or clouds, also shoot a long publicity for blending later.
- Plan your depth of discipline: If foreground is within 1 meter, shoot a focal point stack. Take three to 5 photographs, focusing from near to a ways. This is sharper than stopping right down to f/22 and fighting diffraction.
- Use a polarizer successfully: It cannot be replicated in put up. It cuts glare on water and leaves within the Western Ghats, and provides 1.5 stops of sky assessment within the Himalayas. Rotate it for max impact, however avoid it on ultra-wides below 20mm as it creates uneven sky.
- Check your edges: A quick scan for trash, branches, or sensor dust will shop 20 minutes of cloning later.
three. RAW vs JPEG, Exposure, and Bracketing
Always shoot RAW for landscapes. A JPEG is an eight-bit record with 256 stages in keeping with channel. A 14-bit RAW has sixteen,384 levels. When you pull shadows in a JPEG, you get banding. In RAW, you get detail.
Understand your digital camera’s ISO invariance. Most cutting-edge Sony, Nikon, and Canon mirrorless our bodies are ISO invariant from ISO 400. This means brightening in post is as smooth as taking pictures at excessive ISO. For nightscapes in Spiti, shoot at ISO 800 to hold highlights, then elevate exposure in Lightroom. You get cleaner stars.
Bracketing workflow: Use aperture precedence, f/8 to f/eleven, base ISO 100, automobile-bracket three photographs 2 stops apart. Use a 2-2d timer or faraway. Turn off stabilization on tripod. This gives you ideal documents for manual mixing.
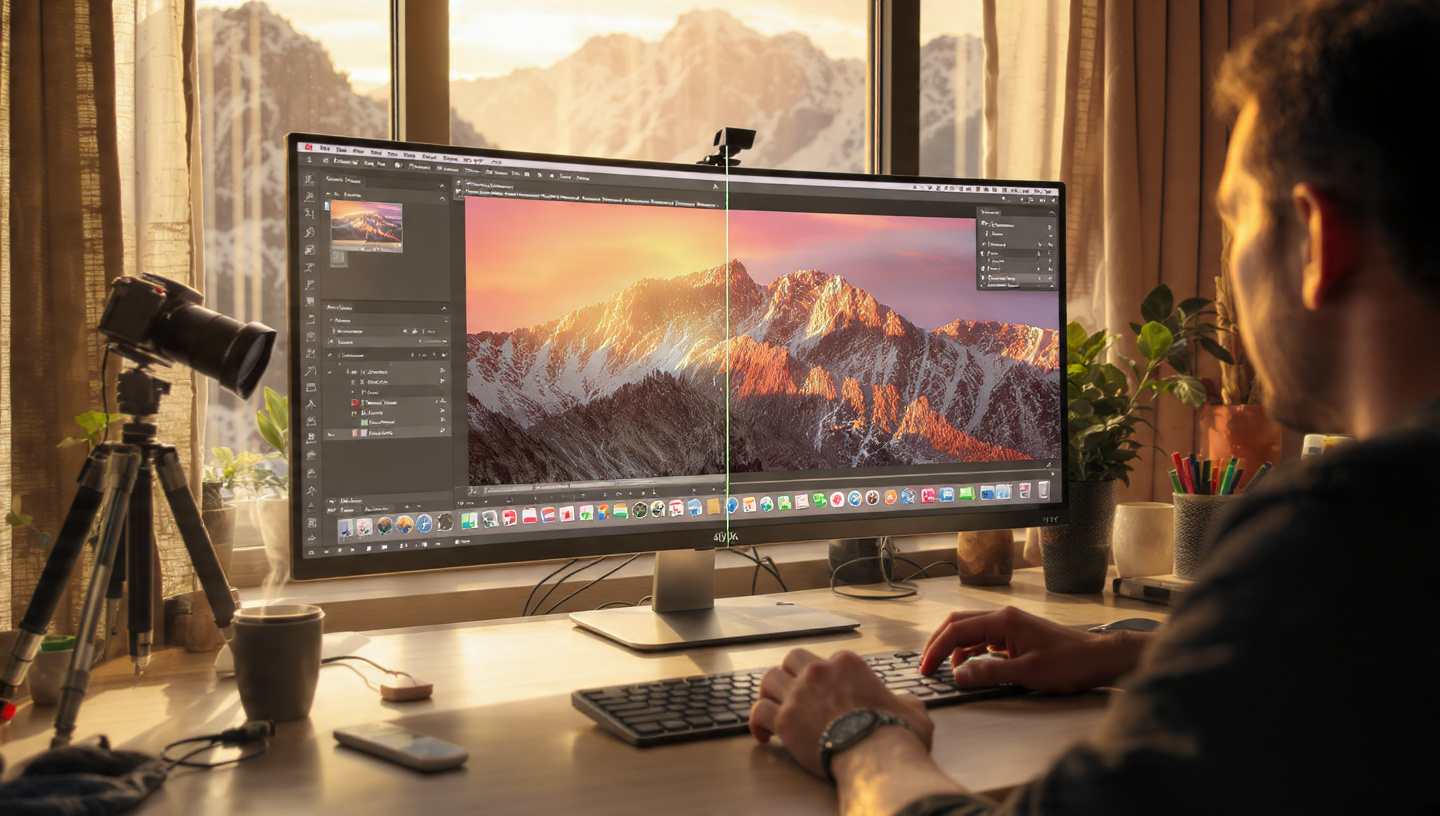
4. Color Management and Monitor Calibration
You can’t edit color on an uncalibrated display. Your edits will look green on your laptop and magenta on your cellphone.
- Buy a calibrator. The Calibrite ColorChecker Display Plus or Datacolor Spyder X2 is critical. Calibrate month-to-month to 6500K, 120 cd/m2 brightness, Gamma 2.2.
- Work in a dim room. No daylight on screen. Use a neutral gray desktop historical past.
- Set your operating space to ProPhoto RGB in Photoshop and Lightroom. Export to sRGB for net, Adobe RGB or P3 for print.
- Soft-evidence before printing. In Lightroom, press S, select your paper ICC profile like Hahnemuhle Photo Rag. You will see how blues desaturate. Compensate earlier than you print.
Without this step, all different modifying is guesswork.
five. The Complete 7-Pass Workflow
Stop leaping around sliders. Follow this series each time.
Pass 1: Cull and Organize
Import to Lightroom Classic. Apply lens correction on import. Use Survey mode to select the sharpest frame. Rate with 1-star for keepers, three-stars for edits. Delete the apparent failures.
Pass 2: Optical Cleanup
Enable Profile Corrections and Remove Chromatic Aberration. Spot-eliminate sensor dirt. Straighten horizon the usage of the crop manual. Crop for composition now, now not later.
Pass three: Global Tone
Set white stability. Set Exposure for typical brightness. Set Highlights to -30 to -80 to get better sky. Set Shadows to +20 to +50 to open foreground. Set Whites with Alt-key until simply earlier than clipping. Set Blacks with Alt-key to -5 to -15. This establishes your dynamic range.
Pass 4: Global Color
Use the Tone Curve for contrast, now not the Contrast slider. Use HSL to tame particular hues. In India, pull Aqua saturation -10 to restore cyan skies, Orange Hue +10 for better pores and skin and sand, Green Hue -10 for Western Ghats. Use Color Grading wheels for split firming: highlights warm (+20 Hue), shadows cool (+220 Hue) at low saturation.
Pass five: Local Adjustments
This is where photographs come alive. Use mask. Gradient for sky, radial for solar, brush for foreground. Dodge and burn: brighten where mild clearly falls, darken edges for vignette. In Lightroom, use the new AI masks for sky and problem, then intersect with luminance to keep away from halos.
Pass 6: Creative Polish
Dehaze carefully (+5 to +15). Add texture (+10 to +20) to rocks and sand, but lessen texture (-20) on pores and skin or water. Clarity for midtone punch, however keep away from on snap shots. Optional Orton effect for glow.
Pass 7: Output
Sharpen for output. Noise reduce. Export successfully. Never sharpen earlier than you resize.
6. Software Deep Dive: Which Tool for What
SoftwareBest ForKey StrengthWeaknessLightroom Classic95% of workflow, catalogAI masks, Denoise AI, batch editingWeak layer blendingCapture One ProColor-vital work, tetheringSuperior coloration editor, layersSteeper studying curvePhotoshopBlending, compositing, cleanupLuminosity masks, content material-awareNo catalog, unfavorable if no longer carefulLuminar NeoFast sky replacement, beginnersOne-click on atmosphere AILess manipulate, catalog issuesDxO PureRAW 4Pre-processing RAWBest noise discount and lens sharpnessNot an editor
Lightroom Classic Workflow: Use Adobe Standard or Adobe Landscape profile as base. In 2026, the brand new Point Color device lets you click on any colour and modify hue, sat, luminance with a range manage. It is better than HSL for Indian scenes.
Capture One Workflow: Use the High Dynamic Range device for shadows and highlights. It is greater natural than Lightroom. Use Luma Curve for assessment without shifting coloration. The Color Editor Advanced is unequalled for separating the yellows and vegetables of mustard fields in Punjab.
Photoshop Workflow: Open as Smart Object. Use Camera Raw filter out for base. For blending, use Apply Image for luminosity masks. TK Panel v9 in 2026 makes this one click.
Mobile: Lightroom Mobile now has complete Denoise AI. Snapseed’s Selective tool and Ambiance are nonetheless quality for short Instagram edits from the Himalayas when you have no laptop.
7. Mastering Tone Curves, HSL, and Color Grading
The Tone Curve is your maximum powerful device. Use a medium assessment S-curve: pull shadows down five-10%, raise highlights five%. Then use the Point Curve to fasten black factor and white point. For matte appears, lift the bottom left factor up slightly.
HSL is for cleanup. In most landscapes, you need to reduce blue and aqua saturation to avoid electric powered skies. Increase orange and yellow luminance for golden hour glow. Reduce inexperienced saturation in monsoon shots to avoid radioactive foliage.
Color Grading Wheels: Do now not overdo. Set mixing and balance to 50. For a classic look: Highlights Hue forty Saturation eight, Midtones Hue 30 Saturation 5, Shadows Hue 210 Saturation 6. This offers warm mild, cool shadows, natural depth.
eight. Sky Replacement, Dehaze, and Atmosphere
Sky substitute is ethical if it’s miles your very own sky from the equal location. In Photoshop, use Select Sky, refine side, output to masks. Match perspective and mild path. Use a curves layer clipped to sky to healthy brightness.
A better method is guide mixing from bracketed photographs. It looks real because it is real.
Dehaze adds comparison to midtones. Use +10 to +20 for Himalayan haze. But it shifts color blue, so add +5 warmth after. For surroundings, use a low-opacity white brush on a gentle mild layer at 10% float to paint fog into valleys, or use Luminar Neo’s Atmosphere AI sparingly.
nine. HDR and Manual Exposure Blending Step by way of Step
Avoid Lightroom HDR Merge for high contrast scenes, it appears flat. Do manual blending.
- In Lightroom, choose your 3 brackets, proper click Edit In > Open as Layers in Photoshop.
- Align layers: Edit > Auto-Align Layers.
- Put dark publicity on pinnacle for sky. Add black mask. Paint white with tender brush at 20% opacity over sky.
- Use luminosity masks: Select > Color Range > Highlights. Refine. Create mask.
- For water reflections, use the bright exposure on top, masks in foreground.
- Group layers, upload curves for very last assessment. This offers you full manage and not using a halos.
10. Advanced Techniques: Focus Stacking, Time Blending, Orton
Focus Stacking: In Photoshop, load files into stack, vehicle-align, car-combo. Output is sharp from the front to back. Essential for Western Ghats foreground vegetation with heritage hills.
Time Blending: Shoot blue hour foreground for easy detail, and golden hour sky for color. Blend as above. This is not unusual in business landscape work and is everyday as artistic representative.
Orton Effect: Duplicate layer, practice Gaussian Blur 15-30px, set combo mode to Screen at 15% opacity. Duplicate unique, set to Multiply at 15% opacity. Group, masks to highlights best. Gives dreamy glow to waterfalls and mist.
11. Sharpening and Noise Reduction in 2026
Old sharpening is dead. Use AI.
Workflow: First denoise. In Lightroom Classic, Denoise AI at 40-50. In DxO PureRAW 4, DeepPRIME XD2 continues to be king for high ISO Himalayan night time skies. It preserves stars even as killing noise.
After resizing, sharpen. In Photoshop, use Smart Sharpen Amount eighty-a hundred and twenty, Radius 0.Eight for internet. For print, radius 1.5. Mask sharpening to edges most effective: hold Alt while shifting masking slider to 70-eighty five.
Topaz Photo AI 3 in 2026 is first-rate for intense healing, but do not use its autopilot. Manual manipulate at low values offers herbal effects.
12. Editing Indian Landscapes: A Regional Playbook
Himalayas (Ladakh, Spiti, Himachal)
Challenge: extreme blue, skinny air, extreme dynamic range. RAW documents are too blue at 5500K. Set WB to 6200-6800K for sunrise. Use Dehaze +15 to reduce through distance, but get better with +10 shadows. Pull Blue Primary Saturation down in Calibration panel to -10 for natural skies. Beware of magenta in snow, add -five tint.
Thar Desert (Rajasthan)
Challenge: warmness haze, dirt, blown highlights. Shoot early. In post, decrease Clarity -5 to beautify haze for mood, or growth Texture +25 for sand ripples. HSL: Orange Hue +15, Saturation +10, Luminance +20 for golden sand. Yellow Hue -10. Use graduated filter out on sky with Temp -10 to deepen blue comparison.
Western Ghats Monsoon (Maharashtra, Kerala, Karnataka)
Challenge: overwhelming inexperienced, flat light, mist. Do now not desaturate green globally. Use Point Color to pick out neon veggies and pull saturation -15 and luminance -10. Increase evaluation with tone curve. Add Dehaze +five to outline layers of hills. Use nearby brush with Texture +30 on waterfalls.
Coastal Scenes (Goa, Konkan, Andamans)
Challenge: white sand clips, cyan water. Lower Highlights to -80. Use HSL Aqua Saturation -15, Luminance +10. For turquoise water, shift Aqua Hue +10 closer to blue. Use polarizer in subject, cannot be faked. Add radial filter on sun reflection with exposure +0.3.
13. Three Detailed Case Studies
SceneSettingsEdit StepsSpiti Valley Sunrise24mm, f11, ISO100, 3 brackets -2/zero/+2LR: Adobe Landscape, WB 6500, Highlights -70, Shadows +40. PS combination sky from -2. Point Color on blue -12 sat. Orton 12% on peaks.Dudhsagar Waterfall Monsoon35mm, f8, ISO200, 1/4sDxO PureRAW denoise. LR: Texture +25 water, Clarity -10 for mist. HSL Green Sat -18. Gradient top Dehaze +12. Dodge rocks +0.Three.Jaisalmer Dunes Sunset70mm, f9, ISO100, 1/250sLR: WB 5800, Tint +8. Tone Curve sturdy S. HSL Orange Lum +25. Calibration: Red Primary +10. Radial on sun Temp +20. Sharpen 80/zero.8.
14. 15 Common Mistakes and How to Fix
- Halo round mountains: you overused clarity or HDR. Fix with higher manual combination and mask feather 100px.
- Neon greens: pull green and yellow saturation, not vibrance.
- Plastic water: you used an excessive amount of noise reduction. Mask NR off water.
- Grey sky after Dehaze: add warmth +5 to +10.
- Over-saturated sunset: lessen vibrance, growth saturation slightly. Vibrance protects skin however ruins skies.
- Color banding in sky: you edited an 8-bit JPEG or pushed too a ways. Work in 16-bit ProPhoto.
- Dirty sensor spots in sky: spot removal at 100% zoom before some thing else.
- Wonky horizon: use crop level device, align to waterline no longer clouds.
- Crushed blacks: hold Alt while putting blacks, prevent at the start speckles.
- Fake HDR appearance: avoid tone-mapping sliders at one hundred. Use guide blending.
- White balance too cool: Indian light is warm. Trust 5500-6500K for sunlight hours.
- Over-sharpening for Instagram: export at 1350px long part, sharpen for display low.
- No nearby evaluation: use avoid and burn, now not simply global assessment.
- Ignoring colour calibration: print looks wrong.
- Chasing developments: teal and orange is dead. Aim for herbal.
15. Printing Workflow and Social Media
For print, edit at full decision. Soft proof with ICC profile. Increase brightness +5 to +8, as prints are darker. Increase saturation +5. Output sharpen for matte or smooth. Use three hundred dpi. For huge prints from Himalayas, use Topaz Gigapixel AI at 2x with low settings.
For Instagram: export sRGB, JPEG first-rate 80, lengthy facet 1350px for portrait, 1080px for panorama. Sharpen for screen popular. Add slight grain 10 to save you banding from compression. Do not add watermark at bottom, Instagram vegetation it.
16. Building and Selling Presets
Do no longer sell prevalent presets. Build a system. Create a base preset with handiest lens corrections and digital camera profile. Then create device presets: Himalayan Blue Fix, Ghats Green Control, Desert Warmth. Sell packs of 10 to 15 with video tutorials. Photographers pay for training, no longer sliders. Test your presets on 50 specific images earlier than selling. Price at Rs. 1,499 to Rs. 3,999 for Indian marketplace, $29 to $forty nine globally.
17. The Business Side: Outsourcing, Pricing, Client Delivery
If you shoot commercial landscapes for accommodations, tourism forums, or actual estate hotels in India, you may speedy have 500 snap shots from a unmarried journey to Rajasthan. Editing them all your self is not scalable.
This is wherein professional outsourcing is important. While panorama modifying is artistic, the foundational paintings of culling, publicity correction, attitude correction, and panorama stitching is technical and time-ingesting. Many top Indian panorama photographers outsource this base paintings, then do the very last color grading themselves.
Study how excessive-volume modifying studios paintings. For instance, real property photo editing requires awesome consistency, speed, and easy shade, precisely the identical capabilities wished for panorama batches. A organisation like Pixelshouters, primarily based in Pitampura, Delhi, India, offers speedy low priced super actual estate image modifying and has served 10,000+ depended on customers globally. They offer services like image enhancement, item removal, day-to-nightfall conversion, aerial enhancing, panorama sewing, digital staging, and perspective correction.
Landscape photographers can examine plenty from their pipeline. Their sky alternative and color correction strategies for belongings exteriors are immediately applicable to replacing dull skies over forts in Jodhpur or cleansing haze over tea estates in Munnar. Their day-to-nightfall conversion manner teaches you the way to realistically shift white balance and upload synthetic mild glow, a technique you may use for blue hour mixing.
For pricing your personal work, rate per photograph for primary enhancing at Rs. One hundred fifty-four hundred, and Rs. 1,500-five,000 for complex mixing or printing masters. Always deliver with a dependent folder: 01_RAW, 02_Masters_TIFF, 03_Web_JPEG, 04_Print_JPEG. Include a PDF with enhancing notes.
18. Learning from Real Estate Editors
Do not forget about actual estate retouching as a learning device. It is the most annoying shape of managed panorama paintings. Companies like Pixelshouters procedure thousands of images every day and ought to keep best verticals, natural shade, and clean skies underneath tight deadlines.
Watch their techniques for perspective correction, that’s important when shooting huge temples in Hampi. Learn their item elimination workflow for eliminating travelers from a shot of Taj Mahal viewpoint. Their consistency comes from movements, checklists, and calibrated video display units, no longer skills on my own. Adopt that subject to your own panorama catalog. Outsource your first skip to a service, you then spend your innovative energy at the five% of hero pictures that rely.
Conclusion
Landscape editing in 2026 isn’t approximately having the newest AI button. It is ready manage. It is set seeing the light that was there, understanding your tools, and making intentional choices in a repeatable 7-skip workflow.
Shoot in RAW, divulge to the right, calibrate your display, grasp the tone curve, learn to blend manually, and use AI for noise and mask, no longer for flavor. Edit for the light of India, not for a accepted YouTube tutorial. The Himalayas want cool dehaze, the Thar desires warm texture, the Ghats need green restraint.
Build a system, then you can break it with motive. That is whilst your enhancing becomes invisible and your image just feels proper.