
When your air conditioner stops working, it can feel like a crisis, especially during the sweltering summer months. Before you pick up the phone to call a professional, there are several steps you can take to troubleshoot the issue yourself. Not only can this save you time and money, but it might also help you identify a simple fix that doesn’t require expert intervention.
In this guide, we’ll walk you through the most common AC problems and how to troubleshoot them. Whether you’re dealing with a unit that won’t turn on, poor cooling performance, or strange noises, these tips will help you get your AC back in working order—or at least determine if it’s time to call in the pros.
1. Check Your Thermostat Settings
The thermostat is the brain of your air conditioning system. If it’s not set correctly, your AC won’t function as expected.
Steps to Troubleshoot:
- Ensure the thermostat is set to “Cool” mode. Sometimes, it’s accidentally switched to “Heat” or “Fan Only.”
- Check the temperature setting. Make sure it’s set lower than the current room temperature.
- Replace the batteries. If your thermostat is battery-powered, low batteries can cause it to malfunction.
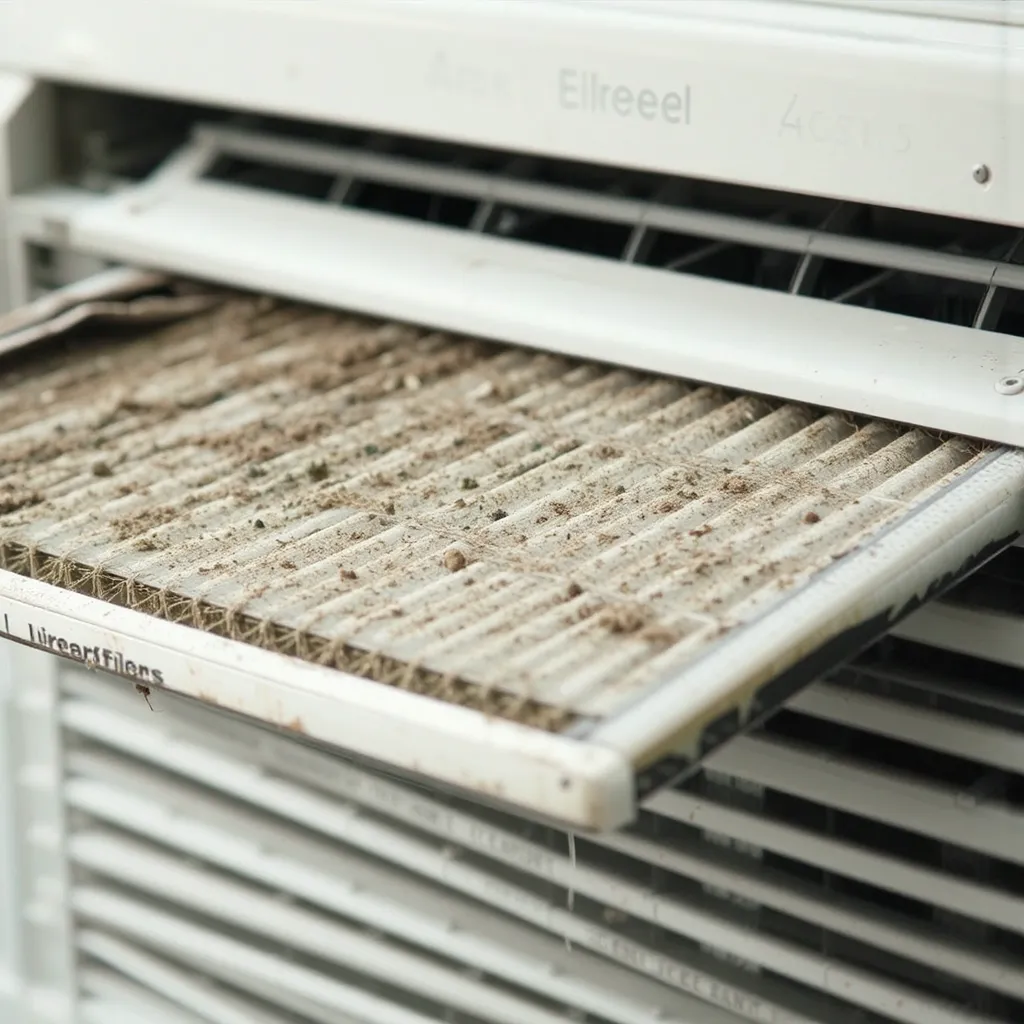
2. Inspect the Air Filters
Dirty or clogged air filters are one of the most common causes of AC problems. They restrict airflow, making your system work harder and less efficiently.
Steps to Troubleshoot:
- Locate your air filter. It’s usually found in the return air duct or near the indoor unit.
- Remove the filter and inspect it. If it’s covered in dust and debris, it’s time to replace it.
- Replace or clean the filter. Most filters need to be replaced every 1-3 months, depending on usage.
3. Check the Circuit Breaker
If your AC won’t turn on at all, the issue might be electrical. A tripped circuit breaker or blown fuse could be the culprit.
Steps to Troubleshoot:
- Locate your electrical panel. It’s usually in the basement, garage, or utility room.
- Check the breaker labeled “AC” or “HVAC.” If it’s in the “Off” position, flip it back to “On.”
- Test the system. If the breaker trips again immediately, there may be a more serious electrical issue.
4. Examine the Outdoor Unit
The outdoor unit (condenser) is a critical part of your AC system. If it’s blocked or dirty, your AC won’t function properly.
Steps to Troubleshoot:
- Clear debris around the unit. Remove leaves, dirt, and other obstructions.
- Check for ice buildup. If you see ice on the coils, turn off the system and let it thaw.
- Clean the coils. Use a garden hose to gently rinse away dirt and grime.
5. Inspect the Drain Line
A clogged drain line can cause water to back up, leading to leaks or even system shutdowns.
Steps to Troubleshoot:
- Locate the drain line. It’s usually a PVC pipe near the indoor unit.
- Check for clogs. Use a wet/dry vacuum to suction out any blockages.
- Flush the line. Pour a mixture of water and vinegar through the line to clear any buildup.
6. Listen for Unusual Noises
Strange noises like grinding, squealing, or banging can indicate mechanical issues.
Steps to Troubleshoot:
- Identify the noise. Grinding may indicate a motor issue, while squealing could point to a belt problem.
- Turn off the system. Continuing to run a noisy AC can cause further damage.
- Call a professional. Some issues, like a failing compressor, require expert attention.
7. Check for Refrigerant Leaks
Low refrigerant levels can cause your AC to blow warm air or fail to cool effectively.
Steps to Troubleshoot:
- Look for signs of a leak. Hissing sounds, ice on the coils, or oily residue near the unit may indicate a leak.
- Call a professional. Refrigerant leaks require specialized tools and expertise to repair.
8. Test the Fan
The fan in your outdoor unit plays a crucial role in dissipating heat. If it’s not working, your AC won’t cool properly.
Steps to Troubleshoot:
- Turn off the power. Safety first!
- Inspect the fan blades. Look for damage or obstructions.
- Check the motor. If the fan doesn’t spin when the system is on, the motor may need replacement.
9. Evaluate the Ductwork
Leaky or blocked ducts can reduce airflow and cooling efficiency.
Steps to Troubleshoot:
- Inspect visible ducts. Look for gaps, holes, or disconnected sections.
- Check for blockages. Furniture or debris can obstruct airflow.
- Call a professional. Duct repairs often require specialized tools and knowledge.
10. Know When to Call a Professional
While many AC issues can be resolved with a little DIY effort, some problems require professional expertise.
Signs You Need a Pro:
- Frequent cycling. If your AC turns on and off repeatedly, it could indicate a serious issue.
- Warm air. If your AC is blowing warm air despite your troubleshooting efforts, it’s time to call a technician.
- High energy bills. A sudden spike in energy costs may signal an inefficient system.
If you found these signs then you need to call an Professional Ac Repair Service.
FAQ
1. What should I do if my AC won’t turn on?
Start by checking the thermostat settings, circuit breaker, and power supply. If these are all fine, it’s time to call a professional.
2. How often should I replace my air filter?
Most filters need to be replaced every 1-3 months, depending on usage and the type of filter.
3. Can I clean my AC coils myself?
Yes, you can clean the outdoor coils with a garden hose. However, indoor coils should be cleaned by a professional.
4. Why is my AC blowing warm air?
This could be due to low refrigerant levels, a dirty air filter, or a malfunctioning compressor.
5. How can I prevent AC problems in the future?
Regular maintenance, including cleaning or replacing filters, inspecting the outdoor unit, and scheduling annual tune-ups, can help prevent issues.
By following these troubleshooting steps, you can often resolve minor AC issues on your own. However, if the problem persists or you’re unsure about any step, don’t hesitate to call a professional Ac Technician. A well-maintained AC system not only keeps your home comfortable but also saves you money in the long run.