
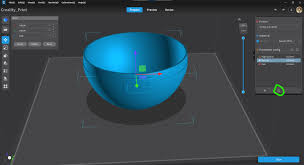
3D printing enthusiasts often look for ways to reduce print times while maintaining excellent print quality. One of the most effective methods is learning how to change print speed on Creality Slicer correctly. Speed settings directly affect the appearance, strength, and accuracy of your printed models. Increasing speed without proper adjustments can lead to issues such as layer shifting, poor surface finish, and weak structures.
Fortunately, Creality Slicer provides several tools and settings that allow users to optimize print speed without compromising quality. By understanding how speed settings interact with other parameters, you can achieve faster prints while maintaining professional-looking results. This guide explains the best practices for adjusting print speed and ensuring consistent print quality.
Understanding Print Speed Settings in Creality Slicer
Before learning how to change print speed on Creality Slicer, it is important to understand what print speed actually controls. Print speed refers to how fast the printer’s nozzle moves while extruding filament. The speed is typically measured in millimeters per second (mm/s), and different print components can have separate speed settings.
Creality Slicer allows users to customize speeds for walls, infill, top layers, bottom layers, travel movements, and support structures. While increasing overall speed can reduce print time, each component affects quality differently. For example, outer walls usually require slower speeds for a smooth finish, while infill can often be printed much faster without affecting appearance.
Accessing and Modifying Print Speed Settings
The first step in understanding how to change print speed on Creality Slicer is locating the speed settings menu. Open Creality Slicer and load your 3D model. Navigate to the Print Settings section and switch to Custom Mode if necessary. This provides access to advanced settings that are hidden in basic mode.
Within the Speed category, you will find options such as Print Speed, Wall Speed, Infill Speed, Travel Speed, and Initial Layer Speed. Start with moderate adjustments instead of drastic increases. For instance, if your default print speed is 50 mm/s, try increasing it to 60 mm/s and test the results. Small incremental changes help maintain print stability while reducing print time.
Balancing Speed and Print Quality
A common mistake when learning how to change print speed on Creality Slicer is increasing speed too aggressively. While higher speeds shorten printing time, they can also introduce defects such as ringing, ghosting, and uneven layers. The key is finding the right balance between efficiency and quality.
One effective strategy is keeping outer wall speeds relatively slow while increasing infill speeds. For example, you might print outer walls at 40 mm/s for a smooth surface while allowing infill to print at 70 mm/s. This approach preserves visual quality while significantly reducing total print duration. Many experienced users rely on this technique to achieve both speed and professional results.
Adjusting Related Settings for Better Results
Changing print speed alone may not produce the best outcome. To successfully master how to change print speed on Creality Slicer, you should also optimize related settings. Temperature is particularly important because faster printing often requires slightly higher nozzle temperatures to ensure proper filament flow.
Acceleration and jerk settings also play a significant role. Higher acceleration values allow the printer to reach target speeds more quickly, reducing print time. However, excessive acceleration can cause vibrations and visible print defects. Adjust these settings gradually and perform test prints to determine the optimal configuration for your specific printer and filament combination.
Testing and Fine-Tuning Your Speed Settings
The most reliable way to learn how to change print speed on Creality Slicer is through systematic testing. Speed test models are widely available and help identify the maximum speed your printer can handle without sacrificing quality. Print the same model using different speed settings and compare the results carefully.
Pay attention to surface smoothness, layer adhesion, dimensional accuracy, and detail preservation. If you notice defects at higher speeds, reduce the speed slightly or adjust supporting settings such as temperature and cooling. Fine-tuning may take some time, but it ultimately helps you create a personalized speed profile that balances quality and efficiency.
Advanced Tips for Faster Printing
Once you become comfortable with the basics of how to change print speed on Creality Slicer, you can explore additional techniques to further reduce print times. Increasing layer height is one of the easiest methods. A model printed at 0.28 mm layer height will finish much faster than the same model printed at 0.12 mm.
Another useful strategy is optimizing infill density. Many prints do not require extremely dense infill. Reducing infill from 30% to 15% can save significant time without noticeably affecting strength for non-functional models. Combining optimized layer heights, infill settings, and print speeds can dramatically improve overall printing efficiency.
Conclusion
Learning how to change print speed on Creality Slicer is an essential skill for anyone looking to improve printing efficiency without compromising quality. By understanding the different speed parameters, making gradual adjustments, and balancing speed with other settings such as temperature and acceleration, you can achieve faster print times while maintaining excellent results.
The key to success is testing and fine-tuning. Every printer, filament type, and model behaves differently, so finding the ideal speed settings requires experimentation. With patience and careful optimization, you can significantly reduce print times and consistently produce high-quality 3D prints using Creality Slicer.
 ponec86
  workoutwithkirk